Set a Custom Homepage in SharePoint 2013 (Online)
I have been forced to learn my way around Microsoft’s ‘sharing and collaboration’ platform over the past few weeks, but, I had issues when trying to load an HTML page in SharePoint Online…
I compiled a static website using Jekyll with the usual standard HTML, CSS, & JS files generated. The plan was to deploy all of the files somewhere inside an internally used SharePoint Online site.
Unlike a normal SharePoint instance, SharePoint Online doesn’t support using an html page as a site homepage. The files could be uploaded, however instead of loading the HTML pages in the browser they would download locally when you tried to load them.
Here’s how I got it to work…
Step 1: Add an ‘App’ to SharePoint site
- Within your SharePoint Online Site navigate to
Site Contents, add a Document Library, set the library name and title toAPP - You should be able to access the library via this address:
https://[COMPANY_NAME].sharepoint.com/[SITE_NAME]/APP/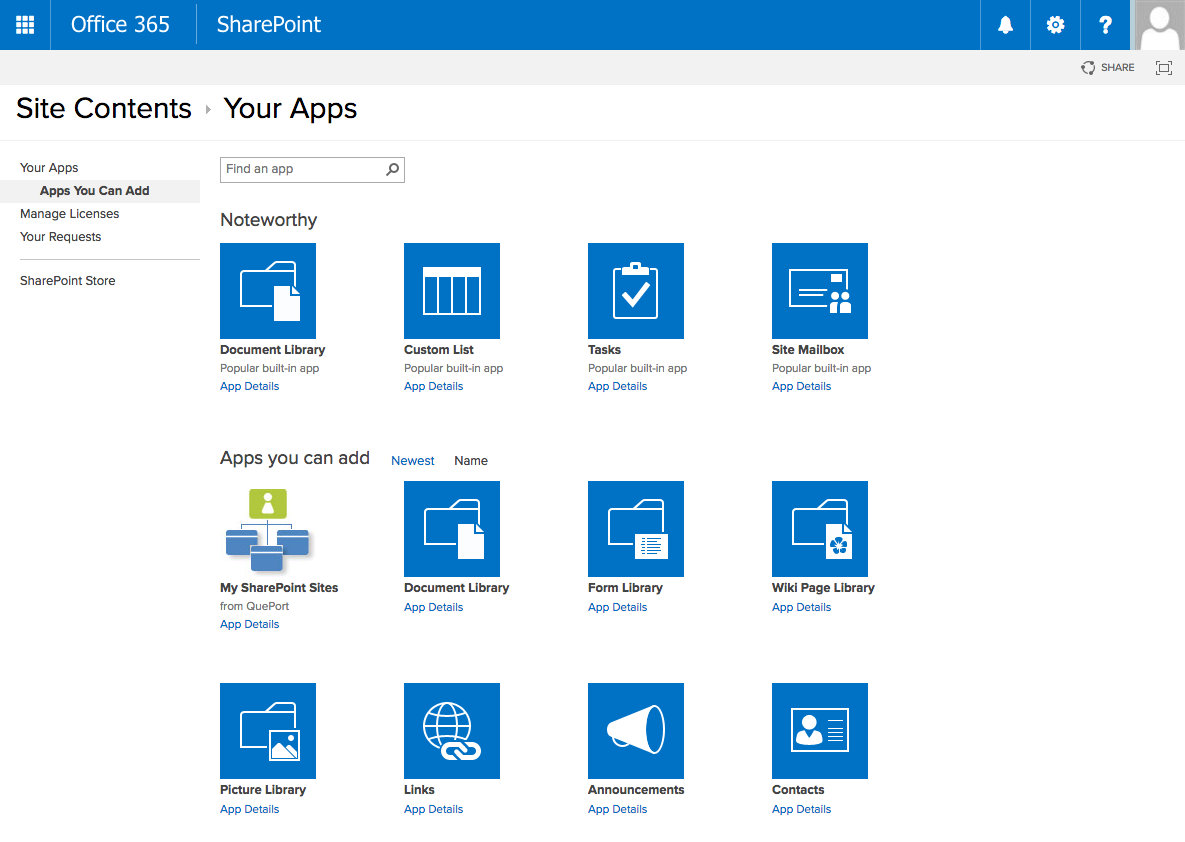
Step 2: Setup Jekyll config file(s)
I used two different config files, _config.yml for local development, _config-prod.yml for deployment:
_config.yml
# URL Prefixing
siteurl: https://[COMPANY_NAME].sharepoint.com
destination: APP
_config-prod.yml
# URL Prefixing
siteurl: https://[COMPANY_NAME].sharepoint.com
environment: sharepoint
destination: APP
baseurl: /[SITE_NAME]/APP
Running jekyll s in terminal will compile all of your files to an /APP directory, and set the site URL to your SharePoint domain.
Running jekyll s --config _config-prod.yml will, in addition, set the environment to sharepoint, enabling us to add environment-specific ‘if’ statements, and, set the base URL to /[SITE_NAME]/APP - which makes sure that all of the URL references in the webpages point to the correct folders inside our SharePoint site.
Step 3: Add sharepoint.js
This additional Javascript file needs to be added to the head of each HTML page which only runs for production…
{% if site.environment == "sharepoint" %}
<script src="{{ site.baseurl }}/assets/js/sharepoint.js"></script>
{% endif %}
This .js file automatically changes all .html page links to .aspx. This is important as SharePoint Online will only load .aspx files in the browser - we can’t have any links pointing to HTML pages.
As the script is only included if the environment is production we don’t need to worry about this interfering with development and we can continue to build our Jekyll site with either Markdown or HTML files as normal.
//Switch all .html references to .aspx for use in Sharepoint
$(document).ready(function() {
  $("a[href$='.html']").each(function(index,element) {
    element.href = element.href.replace('.html','.aspx');
  });
});
Step 4: Change .html to .apsx
As I mentioned, SharePoint Online will only read ASPX files in the browser, so after generating the Jekyll site, you will still needed to change all of the HTML files to ASPX format.
I did this with a simple Mac Automator Script, which changes the file extension - I run it before every deployment.
Step 5: Upload files and set the Sharepoint home page
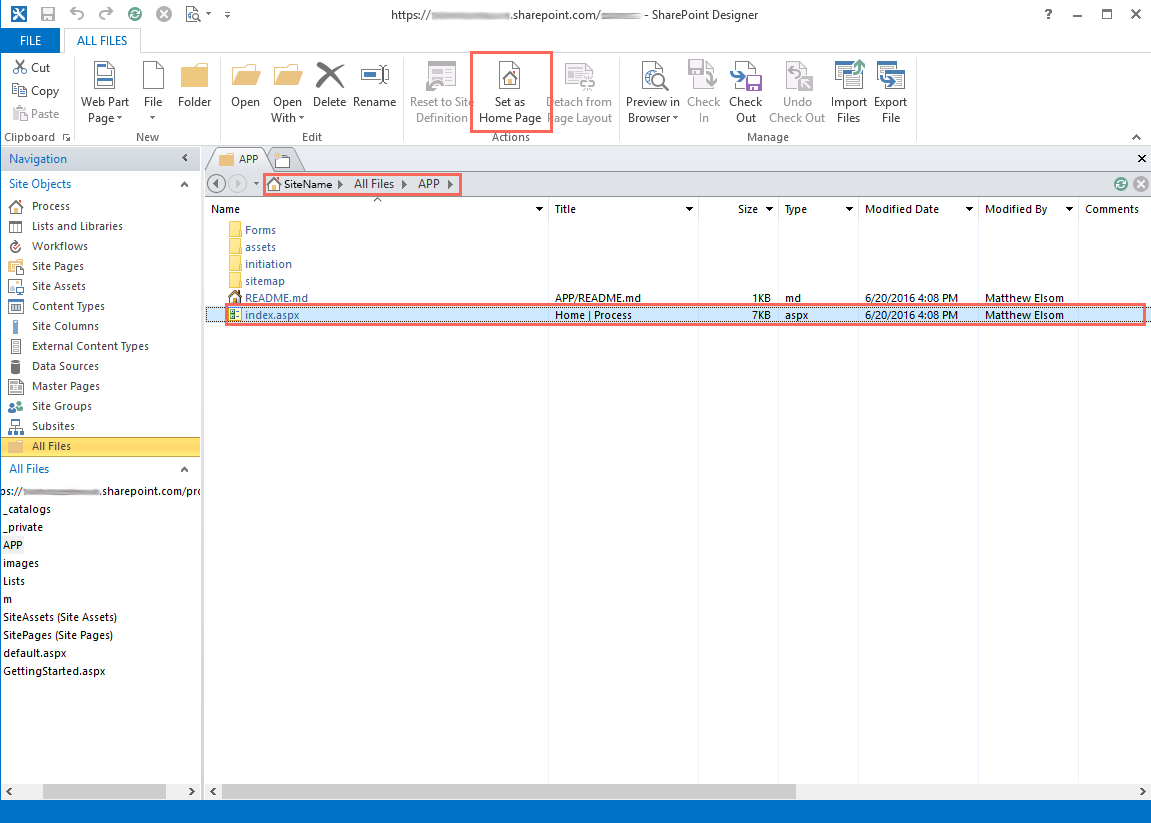
I found SharePoint Designer 2013 (Windows only) to be the best connectioon/transfering method.
After download/install, you can add your SharePoint site and access the /APP Library to upload all of your compiled Jekyll files from the /APP folder.
Once the files have uploaded, select the top level index.aspx (or whichever file is your generated site’s homepage) and click ‘Set as Home Page’ from the ‘All Files’ tab.
This will produce the following redirection for all users:
https://[COMPANY_NAME].sharepoint.com/[SITE_NAME]
<!--Redirects To-->
https://[COMPANY_NAME].sharepoint.com/[SITE_NAME]/APP/index.aspx
And, all pages and links will load in the browser as all the HTML files or links have been changed to ASPX.